How to disassemble Sony Vaio VPCS111FM laptop. Fixing power button.
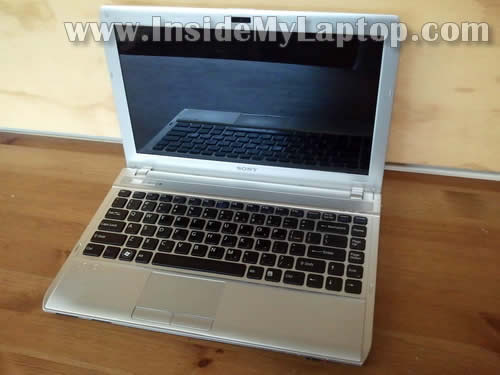
Also, this laptop has another model number on the bottom: Model PCG-51211L.
Here’s what happened. The power button got pushed into the laptop case and stopped working. It wasn’t possible to turn on the laptop at all.
In order to figure out what’s going on I had to disassemble the laptop base and take a closer look at the power button.

By the way, here’s my previous post explaining how to replace LCD screen on Sony Vaio VPCS111FM laptop.
STEP 1.
Make sure the laptop is turned off. Remove the battery.
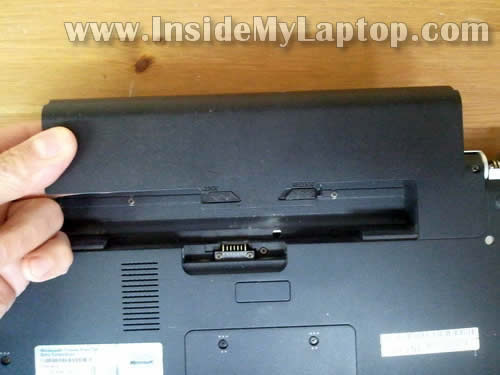
STEP 2.
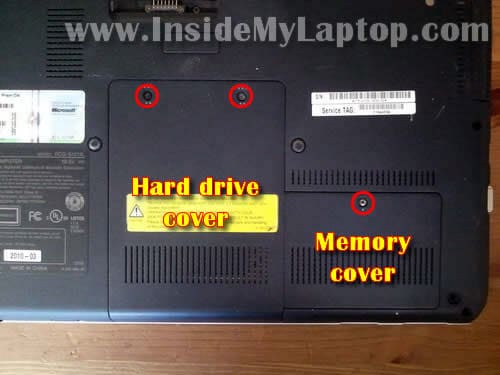
Remove four screws securing the hard drive and memory cover.
It’s not necessary to remove the memory cover for the purpose of this guide. I’m doing it just to show where laptop memory located.
STEP 3.
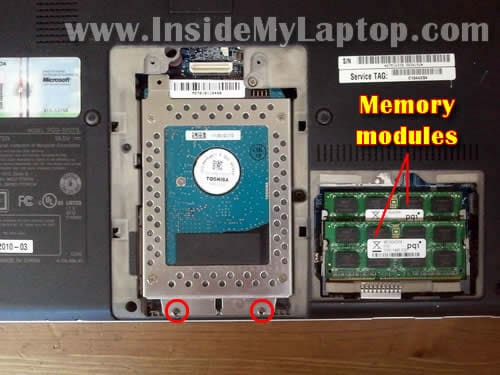
Remove two screws securing the hard drive assembly.
As you see, both memory modules can be accessed on the bottom of the laptop.
STEP 4.
Slide the hard drive assembly to the shown direction to disconnect it from the motherboard.
Remove hard drive assembly from the laptop.
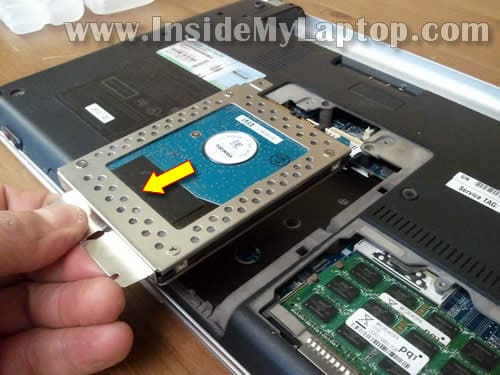
STEP 5.
Remove two screws securing the DVD drive.
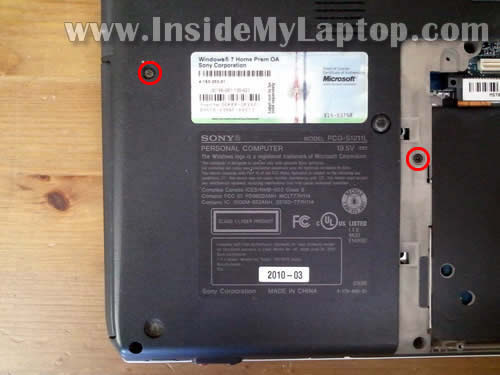
STEP 6.
Push DVD drive with a screwdriver and pull it from the laptop.
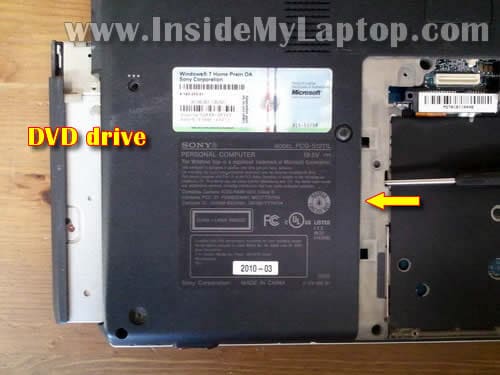
STEP 7.
Remove all screws from the bottom of the laptop.
NOTE: my Sony Vaio VPSS111FM laptop had both hinge covers missing. I don’t think you’ll have a problem removing them.
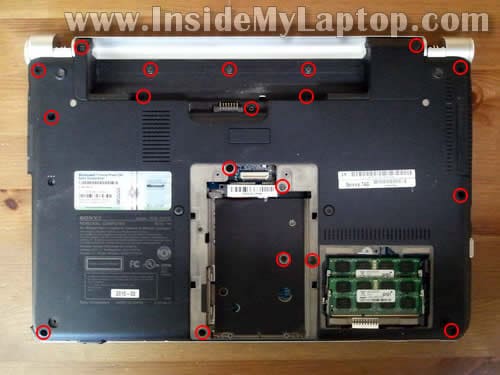
STEP 8.
Remove the express card cover.
Don’t forget to remove one screw located under the cover.
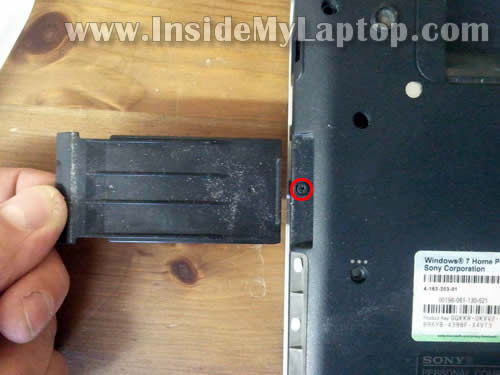
STEP 9.
Now you should be able to lift up the bottom cover and remove it from the laptop.
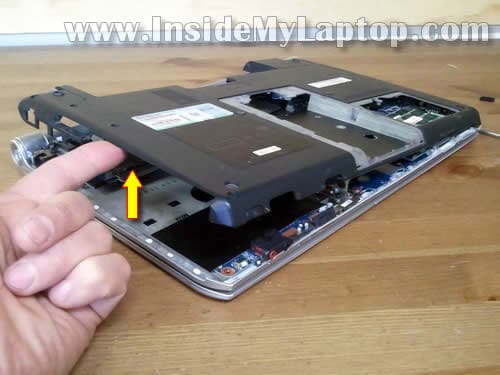
STEP 10.
The bottom cover removed.

STEP 11.
Under the top cover you’ll get access to the cooling fan assembly (fan and heatsink).
If the cooling fan looks dirty, blow the dust off the fan and heatsink.

STEP 12.
Remove screws securing the express card board.
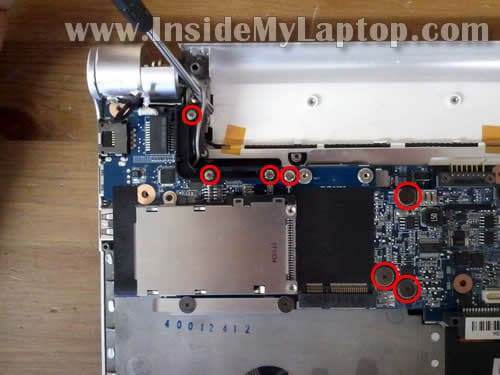
STEP 13.
Disconnect the power button board cable from the express card board.
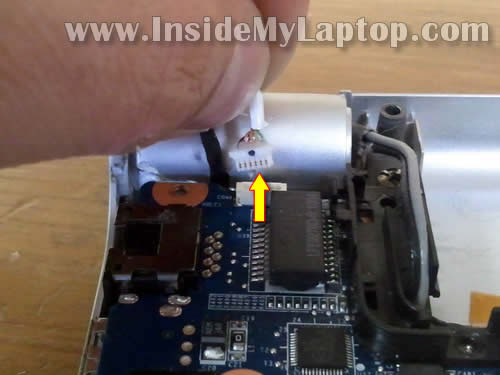
STEP 14.
Carefully lift up the right side of the express card board to disconnect it from the motherboard.
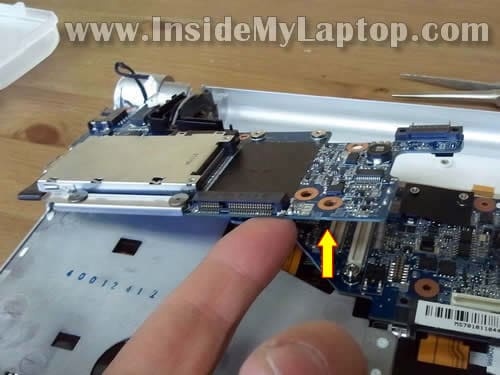
STEP 15.
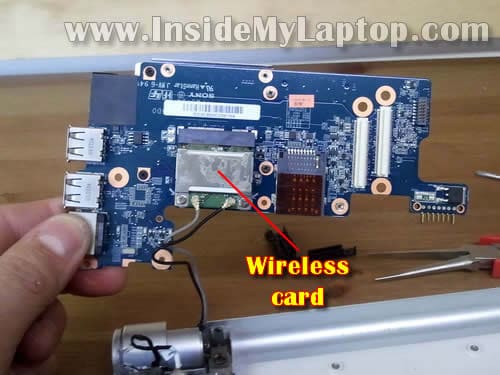
The express card board still connected to the laptop by two wires (wireless card antenna cables). It’s not necessary to disconnect them. Just put the board aside.
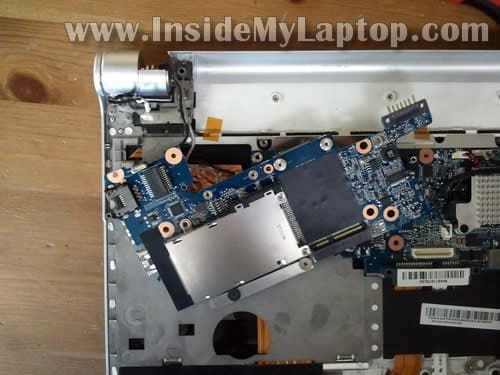
The wireless card attached to the bottom side of the express card board
.
STEP 16.
Remove one screw securing the power button cover.
Lift up and remove the cover.
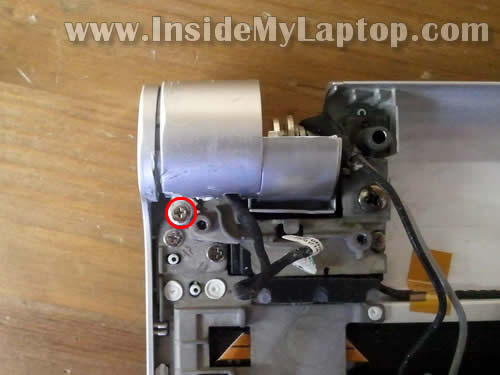
Now you can see why the power button got pushed in.
The power button board mounted on the metal frame which is part of the top cover assembly.
A part of the metal frame where the power button board attached broke off.
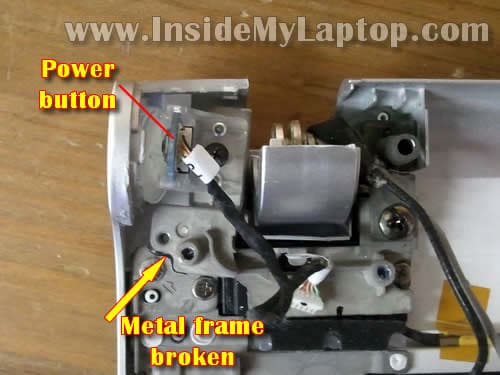
STEP 17.
Remove the broken metal frame with the power button.
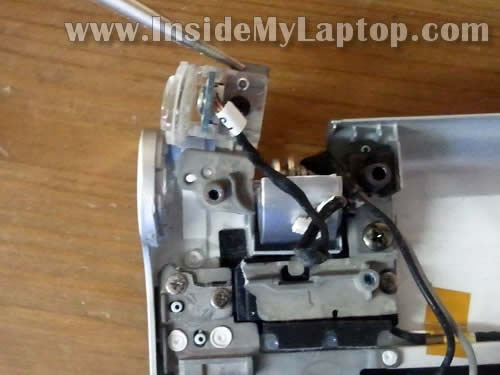
STEP 18.
Remove one screw securing the power button board to the frame and remove the board
.
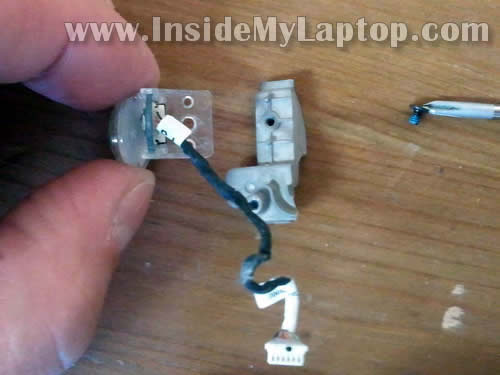
Now I’m going to glue the broken metal piece back to the main chassis.
I’ll be using JB weld Cold Weld compound to attach two metal parts
.
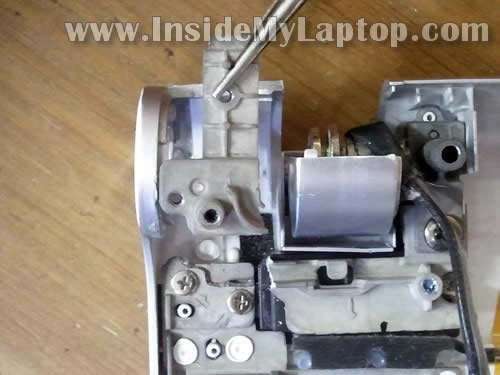
I glued broken parts and let it cure overnight.
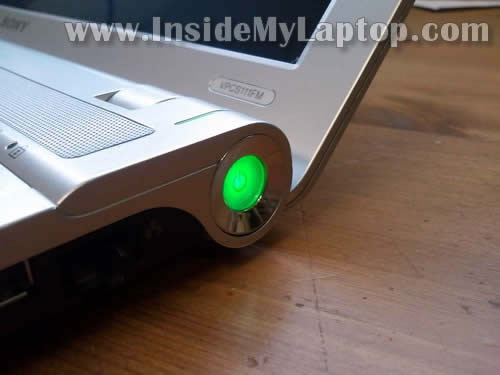
The next day I assemble the laptop and voila! The Sony Vaio VPCS111FM power button fixed!
All are great picture. its useful for all.
BalasHapusSony Laptop Service in Anna Nagar